Quantcast
Channel: My Chemical-Free House
Viewing all 96 articles
Browse latest View live

Practicing Mould Avoidance

$
0
0
How to Practice Mould Avoidance as Outlined by Erik Johnson

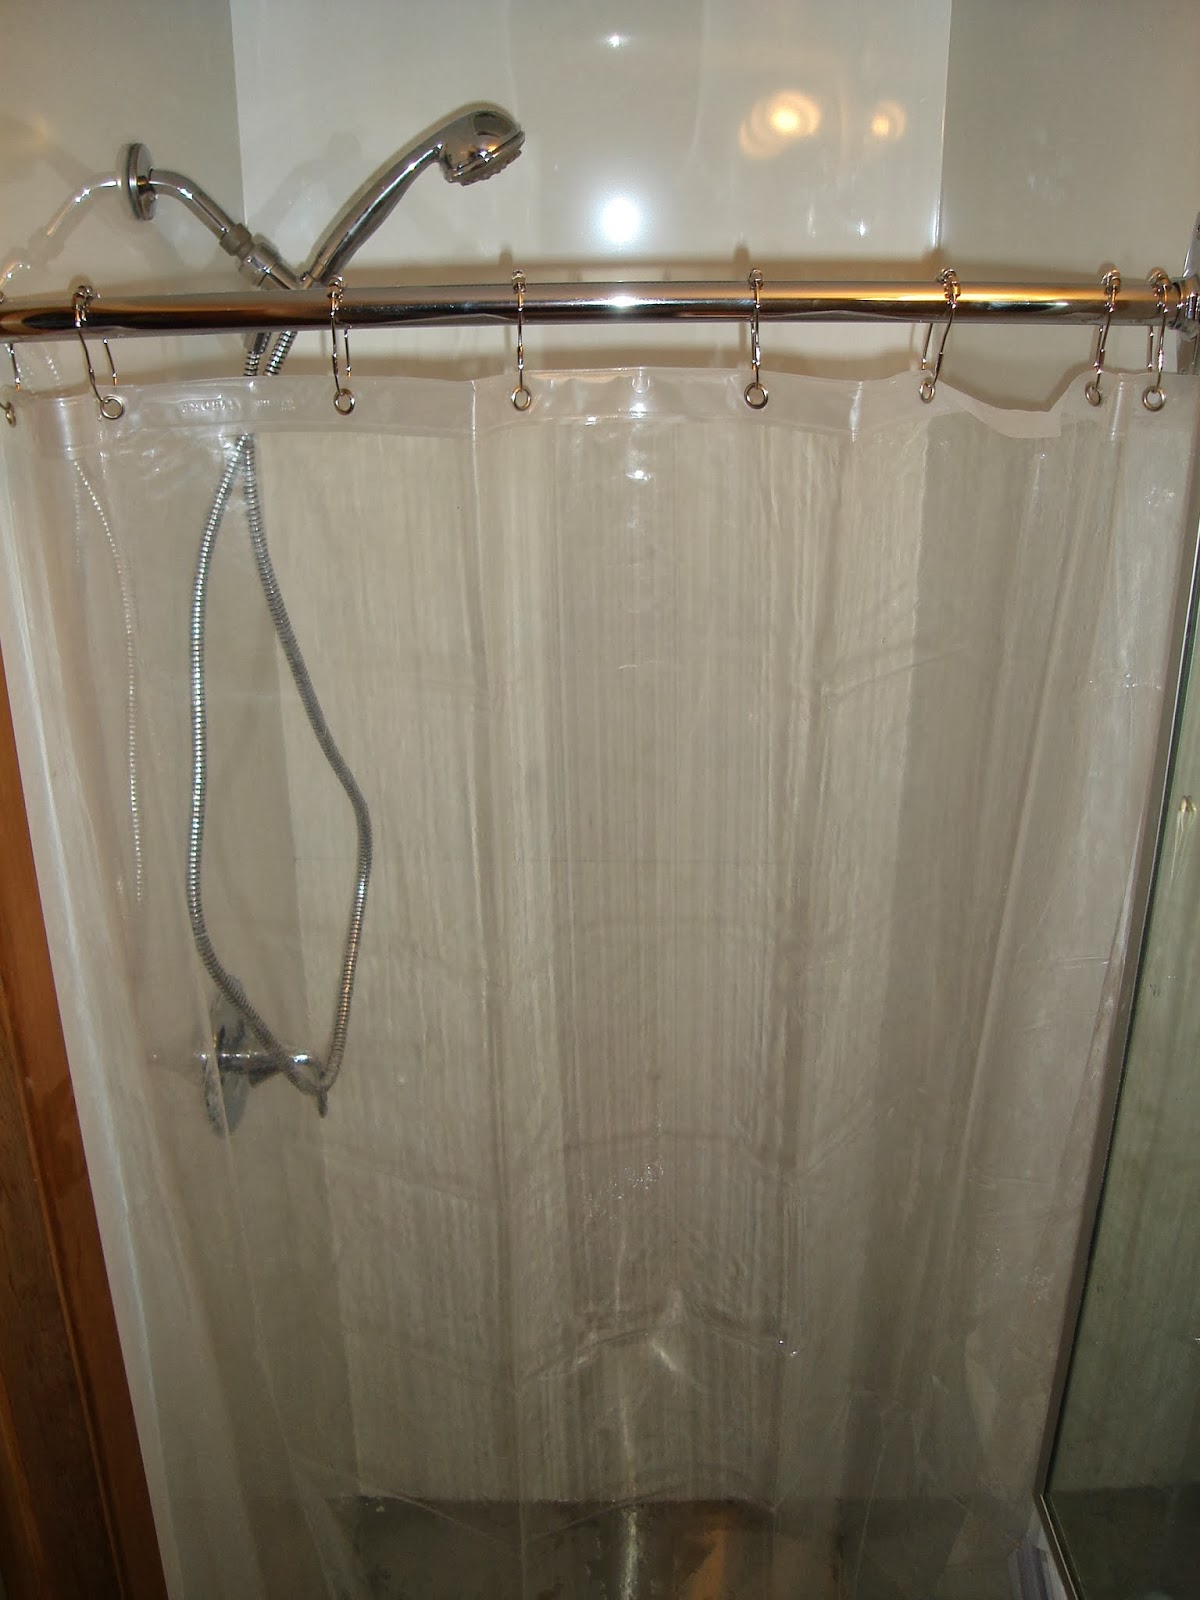
Toxic Mould Via www.ciriscience.org

"Mould Warriors" are those who advocate mould avoidance as a treatment for MCS and CFS (among other conditions). Richie Shoemaker, Lisa Petrison and Erik Johnson are a few of the biggest proponents. Lisa and Erik have been advocates for "extreme mould avoidance," a system that has cured them both of CFS. I will outline what is involved in this treatment and then go in to how to do a test run to see if mould is affecting your health.

I believe, like Erik, that sensitivity to mycotoxins (toxins from mould) is MCS. My definition however, is much broader and I advocate for extreme VOC avoidance, not just mould toxin avoidance. I am proposing that his protocol can be used by MCS patients for any and all chemical substances that you react to. I have noticed, like many MCS patients, that when you get out of a chemical-filled environment you go through the period of increased sensitivity (like Erik explains with mould sensitivity). Once you become very aware of what is bothering you, it becomes easier to avoid toxins, and in turn avoid many of the symptoms of CFS. After some time, the body will heal and you can recover from this hypersensitive state. Many have recovered from CFS completely.

If you have CFS and you do not perceive any sensitivities to mould or other environmental toxins I would suggest that you have become too acclimatized to them and should at the very least conduct a short experiment by finding temporary safe accommodation in the cleanest environment you can afford. (For inspiration on others who have improved from moving to a cleaner environment check out The Locations Effect). Erik talks about a "Mobile Environmental Control Unit" which is a "safe house" trailer or RV totally devoid of mould. I have written a post on mobile safe homes and safe trailers.

Here I will summarise Erik Johnson's mould avoidance protocol based on the document "Role of Toxic Mold in CFS", which is 
available here. A new guide that is much more concise is now available: A Beginner's Guide to Mold Avoidance: Techniques Used by Hundreds of Chronic Multisystem Illness Sufferers to Improve Their Health.

Mould Avoidance, According to Erik Johnson


Acute Symptoms to Mould Toxins Include:
  • Anxiety and depression 
  • Vague feelings of unease 
  • Heart palpitations; sense of cardio-distress
  • Feeling like you can't breath
  • Skin hypoperfusion 
  • "Sensation of extreme lethargy that inexplicably abates upon rising."
  • A burning sensation in the nose

Locating the Toxins and Identifying Your Personal Response to Them:

  • Keep in mind mycotoxins do not necessarily have an odour, and not all mould is toxic.
  • To figure out your reaction:  go into a contaminated place and note the symptoms, then go through a decontamination protocol and enter your safe house or pristine location (outdoors), and compare how you feel. (More on decontamination protocol below).
  • To fine tune your ability to detect contaminated objects: take an object you know has been in a place contaminated with toxic mould, take it out to a really clean location and notice how you react to that object. (Do not bring it into your living space, test it outside).
  • Note that reactions to objects are cumulative. It is not necessarily just the one that tipped you over the edge that is the culprit.
  • Your own specific reaction is your best guide to figuring out the source of the toxins.
  • Anxiety and depression symptoms are better indicators than "physical" reactions.
  • Insomnia is another really good indicator of exposure. 
  • Remember that symptoms can be delayed for about 4 hours.
  • To test a house for mycotoxins, you have to sleep there for a number of nights. Changes in the wind and weather can release toxins or bring in different toxins through the air.
  • Note how changes in the weather and EMFs can affect the mould spores and toxicity of a place.

How to Practice Mould Avoidance:

Setting up shop:
  • Put everything in storage (bringing your old possessions to a new safe house will reverse all your other efforts).
  • Buy a safe trailer or tent which will be your new temporary home.
  • Find a clean location. Somewhere as "pristine" as possible. The desert, the coast, islands etc. 
  • Assess every item before bringing it in. If not acceptable - wash, leave in the sun and assess again. Some items hold on to toxins while others can easily be washed. 
  • Move your trailer as quickly as possible to another location if you detect that the outdoor air contains toxins - if the place where you sleep is being contaminated by outdoor toxins you must move; having a safe place to sleep is of utmost importance.
Decontamination:
  • If you go through an area contaminated with mould, shower and change your clothes. (You may be showering up to 10x per day).
  • Leave contaminated clothes/items in an isolation area, preferably outside, bag them to be cleaned and re-assessed later. Don't bring anything contaminated into your safe house, especially the room where you sleep.
  • Bag clothes, shower and change clothes as soon as you can after any exposure in the beginning. (until you have significantly improved).
  • Thoroughly washing your hair is important after being somewhere significantly toxic.
  • Shower before sleeping and make sure nothing contaminated comes near your sleeping area. 
  • Store or throw away anything you cannot remove toxins from with washing; remember that some items absorb the toxins and they cannot be washed off.
Upkeep:
  • It's difficult to avoid contaminating a mattress or pillow so a camping cot is recommended instead. A washable sleeping pad and blankets can be used for padding. A rolled-up towel can be used as a pillow. If you feel that any of your bedding has been contaminated, wash it, and  put it out in the sun if the air is clean.
  • After washing, it is usually best to dry bedding and clothes inside the safe house. Keep extras bagged.
  • In the daytime cover bedding with a plastic cover (a poncho even).
  • Having layers of bedding is handy in that you can wash and replace top layers frequently, as they become contaminated easily.
  • New furniture (or other items) need to be tested for your own sensitivities before bringing into the safe house. Many warehouses are mouldy and can contaminate items.
  • Electronic devices are fine as long as kept in the safe zone. Once they pick up toxins they cannot be decontaminated.

Stages of Mould Avoidance:
  1. Prior to starting avoidance, the body masks acute symptoms making it difficult to pinpoint exactly the source of the toxins. The patient usually gets incredibly sick before finding the impetus to move and start mould avoidance. (You don't have to wait until you hit rock bottom though!)
  2. The safe trailer and pristine location together form a baseline.
  3. Out in a clean environment the patient becomes much more sensitive and attuned to toxins and gains the ability to identify their source, and therefore avoid them (here is where it may seem that it is getting worse before it gets better).
  4. After 6 months or more of following the protocol and detoxing, the person starts to recover and can then build up their tolerance again.

Building up Tolerance/Re-integration:
  • After following a strict protocol of avoidance and decontamination Erik was able to build up his tolerance to toxins. Erik was then able to go back to work in a place that had been problematic before. He can handle doses of toxins as long as he keeps the exposure within his limits.
  • Continuing to have a safe, clean place to sleep is important as our bodies do significant healing at night.
  • Items can be brought back out of storage. The worst items offgassed after 5 years (if the storage facility was not mouldy).
  • Re-introduce items or problematic locations slowly so that you can stay within your tolerance level.
Erik adds that: "this strategy applies regardless of whether the nature of the chemical injury is - either mold or some other chemical, or perhaps even both." I agree; I think that this strategy can be used for sensitivities to all types of chemicals for those with MCS, CFS and Fibromyalgia. While this strategy may seem extreme at first, imagine the benefits of regaining your health after 6 months to one year! I wish you luck in your mould-free and chemical-free healing journey. 


To read more about Dr. Shoemaker's mould detox protocol, see: Surviving Mold :Life in the Era of Dangerous Buildings.

If you have more questions about practicing mould avoidance, you can read Q&As here.


Avoidance Test-Run/ Mould Sabbatical

Almost everyone I know with CFS/fibro has felt better in a "good location". Unless they have not traveled, I have yet to find someone that once you ask, will start to tell you that they felt "80% better in the Dominican" or had most symptoms go away while camping in a national park or while vacationing in Cape Verde or Aruba. There are many more stories on the Locations Effect page (links below) from people who have recovered from CFS using this method including Lisa Petrison, Erik Johnson and I would even include Dave Asprey in this list.

Here are the steps necessary to test this treatment method out for yourself:

Step 1. Find a good location

Using the Locations Effect Facebook pageLocations Board and suggestions from others who have recovered from CFS, find a good area.  The key aspect here is the outdoor air quality. People have felt remarkably better in places that are exceptionally pristine, these might be in the mountains, tropical coastal areas or the desert. First pick a town/area based on recommendations and proximity to you, and then look at lodging.

Mercy Hot Springs, Firebaugh, CA
Lisa Petrison recommends the accommodation at  Mercy Hot Springs (CA) and KOA. Here is a detailed post on what you need to know about getting clear at Mercy. The KOA in Moab UT is one that is recommended.

Lisa mentions that the KOA Cabins are log cabin construction with no plumbing. Just check in with how recently they have treated the wood. Note that she has found some of their bathrooms are mouldy. It's important to pick a KOA location in an area where the outside air is good.


Ghost Ranch NM
Other good locations in the US include: Ghost Ranch (Abiquiu) (NM)Black Hills area (SD); Palm Springs/Joshua Tree, Death Valley; Las Vegas, (Nevada)  (Here is the full list with descriptions). St George, UT is no longer good, but there are excellent reports from Vally of Fire State Park, NV. 

Another HealClick member saw a total remission of symptoms at Seventh Mountain, Oregon (They use non-toxic cleaning and bath products).

Here is another review and great discussion of good US cities and towns such as:  Grand Junction & Durango (CO); Socorro & Taos (NM); Moab & Cedar City (UT); Helena (MT); Wichita (KS); Hollister (CA)(Join HealClick to see the full discussion).


Boa Vista Island, Cape Verde, Africa
On the Locations Effect Facebook page you can find many good reports for the Caribbean (Yucatan, (Mexico), Aruba, etc.) as well as other tropical islands such as The Canary Islands (Spain, off the coast of Africa) and Cape Verde (Africa, off the coast of Senegal).

I have also heard very good reports from the Dominican, Cuba, Puri (India), and Mt. Kailash, Tibet.

In Canada I have heard that Forillon Park (QC) is good for camping. I recommend OUR Ecovillage (BC) both for camping and many of their cob buildings are good for healing (I had an immediate improvement there and did a lot of recovering). In BC here are some options for natural home rentals where people have healed:

North Vancouver - I know someone that did a lot of healing at this rental. The house was made with eco materials. Ask about cleaning products.

Duncan (Vancouver Island) - This off the grid ecohome looks great. It is in logging company land so there could be concerns over spraying herbicides in the area, but this doesn't happen often. I have done a lot of healing in this area.

If you are coming from a bad place the first step does not need to be a perfect - if the outside air is reported to be good by multiple avoiders then any building that is not mouldy or new will likely be better than nothing (i.e. better than not trying at all). More tips on finding accommodation below.

Step 2:  Decide if you want to stay in a tent, trailer or regular lodging

A tent is less risky as you have way more control over the environment you are sleeping in (but is difficult to offgas). A tent can be hard for someone who is extremely sensitive to temperature like I am. I have a very narrow range that I can tolerate so sleeping in a tent is almost impossible for me.

Finding lodging that is chemical/scent/mould-free is trickier, and everyone is different in their sensitivities so even a good "recommendation" is tricky. Places also may have been contaminated since the recommendation was made.

a) Tenting

See these articles on camping: EI Wellspring  Safer Camping and Safer Camping Equipment, and this 3-part series by Re|shelter: Part 1Part 2 & 3.

b) Trailer

Mercy Hot Springs has Airstreams for rent. I have a chemical free all aluminum trailer for sale that could be taken around to different locations.

c) Indoor lodging 

Seventh Mountain uses natural cleaning products
Go with somewhere recommended by someone who has recovered there. If that is not possible, find somewhere that used natural building materials, and uses natural unscented and chemical-free cleaning products in an AREA that has been recommended.

Ask about recent renovations, mould/water damage, and cleaning products. Types of buildings that can be good are natural buildings (i.e. adobe), and concrete high rises found in tropical countries.


Top floor of concrete building w/ tile floor usually good if ~5yo
You ideally want tile or stone flooring. Definitely not carpet. Anything about 5 years old is usually best. Old buildings (more than 10 years) are likely not good unless they are made out of stone (concrete also is good over 10 years).

A simple wood structure in a tropical area that is new would be good (i.e. treehouses! wooden yurts, beach huts) (if something is made of only wood than there is nothing to offgas but it will go mouldy with time, so the newer the better).

 
Step 3. Prepare the items you will take with you

Note: This is Avoidance procedures from those who have recovered from CFS, MCS and Mould illness and I am presenting the most extreme, or most thorough, version of this protocol which should be followed if you are very sick. (If you are not very sick you could try a moderate version). 

Don't take anything with you other than specially prepared clothing and toiletries below. (Bringing your things with you will reverse your efforts!). Other necessary items like medication can be isolated. *Note: if you are coming from somewhere that you know if already pretty good or you don't have the energy to isolate all your stuff an easier version of this experiment is just to buy some new clothes keep them bagged up until you arrive, and bring only absolute essentials like medication. I think that is certainly better than not trying, but you will get a really good sense of how location affects you if you don't bring your belongings.

a) Clothing

Bring two new outfits: Organic cotton clothing is best in my experience, I recommend this store to buy leggings and t-shirts from (ships to Canada too, is cheap but not great quality). When they arrive in the mail put them in large ziplock bags.

Towels: bring one towel. Towels from Coyuchi are great. Or these organic towels from Amazon. (Or just use a t-shirt!)

Shoes: keep outside in your new location. You might need to buy shoes that will not go mouldy/mildewy when left outside like rubber boots with no lining or these cute rubber shoes which I have, and love.

b) Chemical-free/scent-free toiletries

Order the following items online:
And yes these are all products I have tested. This is not the time to try soaps or shampoos with essential oils! (you may become sensitive once in the clean location) and definitely not the time to use chemical-filled versions.

You can also order any supplements & OTC medications you need to take with your from Vitacost (10$ off with this link!)Vitacost just became super affordable for Canadians (flat rate 10$ shipping even on a big box of stuff! And their products are MUCH cheaper than ones bought in Canada).

When the items arrive in the mail use the same sequestering procedure as with clothes. I have found the boxes from Vitacost to be scent-free, so you could leave the items in the box and wrap the box in foil, or garbage bag.

Also, bring extra plastic bags for containing clothes.

c) Medication

Clean out some glass containers to put your medication in. Or just leave as is and store in the bathroom in your new location as opposed to right next to you while you sleep!

d) Electronics, Books, Money etc

Electronics (computers and cell phones) and books should not be brought unless you can keep them in your car. Electronics and books cannot be decontaminated except with loads of time (years). Use sparingly if you must use them because even using them outside could trigger a reaction. Do not bring makeup, jewelry or camera or an iPod for the same reason.

If you need ear plugs or eye mask you can also order these online and use the same procedure as with clothes.

Credit card/bank card/cash and IDs: bring and store in zip locks or keep outside.

If you need any other electronics (a white noise machine, heating blanket, Kindle) buy through the mail and isolate like the other things. New electronics, esp heating blankets are quite toxic when new so better if you can go without. This is not the time to spend money on all new things like electronics because this test run might be an intermediate step to finding a cleaner more permanent location and that is the time you will want new things.

Bring your glasses and keep them in the washroom at night unless you are overdue for a new pair.

e) Anything else buy at your new destination such as more clothing, Advil etc.. Do not buy anything made of toxic materials until you have gotten clear for a while (i.e. books, electronics). Note: some things obviously are not as urgent and can be ordered online once you arrive (like some supplements).

Step 4. the Decon Procedure for Body and Clothing 

When you arrive at your accommodation immediately bag your clothes in a plastic or aluminum bag. Get in the shower, scrub down with your scrubber and specially bought soap and shampoo and then put on your new clothes. Store your "travel clothes" in another location, i.e. your car or in a plastic bag outside.

If you can, wash the bedding when you arrive or bring your own and request no bedding.

I get my bedding from Coyuchi which is absolutely fantastic and doesn't need to be decontaminated before use. If you want to bring bedding and towels I go with Coyuchi so that you know it is chemical-free.

Wash clothes by hand with non-toxic, scent-free soap. If you feel that they got contaminated from another building or outdoor location use borax with the soap. (Borax can be found at grocery stores). Soaking in milk has also been recommended. Not a bad idea to use the borax method to be safe even if you are unsure if they got contaminated. Hang to dry in your safe space or outdoors. The sun helps to remove mould from clothing.

When you come inside from a car or another building: shower, bag clothes, and put clean clothes on. Then wash clothes as soon as you possibly can.

Step 5. Diet

It would be a good idea to follow a low-mycotoxin diet as outlined by Dave Asprey if you can. Especially important is low mycotoxin coffee and chocolate (if you must!) from Dave's store: upgraded self - Shop Bulletproof Upgraded Coffee at UpgradedSelf.com.

Another note is that supplements might become more noticeably helpful when in a clean location so don't ditch them completely.

A few notes:
  • I see improvement in symptoms after one day of being in a good location. Certainly one week is minimum for your test run and I think one month is better.
  • After a few weeks you will have a heightened sense of smell and will be able to detect contaminated objects much more easily. Note that some moulds do not have a scent.
  • EMFs in a location are an important factor as well as pollution, chemicals and mould
  • If you have specific questions for Lisa Petrison and others who have recovered, see the fantastic Q&A page Avoiding Mold 

To see the list of my other posts please go to the home page first in order to bring up the list on the right hand side of "posts by topic." 


"Safe House" Cob House Plans

$
0
0
MSC "Safe House" Plans (approx. 535 sq ft, interior)

Basic Layout
This cob/light clay house is designed for someone with sensitivities to chemicals, mould, noise and heat. It is ideal for someone with MCS, CFS or Fibromyalgia.

Plans include: Foundation Plan, Detailed Floor Plan, Elevations, Sections, Roof Plan. (click here for samples)

The plans are available in PDF format.


Features:
  • Cob walls on south, west, and east sides. The north wall could be light clay, straw bale or concrete, depending on your climate. 
  • A bedroom on the north side (with no south facing windows) will stay nice and cool in the summer, eliminating the need for AC.
  • South facing windows in the living space take advantage of passive solar energy year round. An overhang could prevent summer rays from overheating the living space in the summer if heat is a major concern. The bedroom will stay cool as a space to retreat to in the summer.
  • Bedroom with a separate entrance to accommodate light sleepers.
  • Bathroom walls to be made of mould-proof MgO board.
  • Kitchen space designed to contain a two burner hot plate, convection toaster oven, and under the counter fridge.
  • All plumbing on one (inside) wood-framed wall with no insulation. Easy to get access to pipes in case of a leak. (You can put a little door on this wall to inspect the pipes to prevent possible water damage and mould.)
  • Toilet is intended to be a composting toilet.
  • Optional wood stove for drying out the walls during building to prevent mould. Could then be used as backup heat, or removed, depending on sensitivities.
  • A mechanical room at the opposite end from the bedroom to limit exposure to EMFs.
  • Loft space above living room as second sleeping space.
  • Optional cob bench or room for a sofa or seating of your choice.
  • Large closet space; built-in bookcase; entryway for coats, shoes, recycling; extra storage in loft.

For information on building materials please see list of "Posts by Title" on this blog - we will be going through each aspect of the build. For more detailed information on building a chemical-free, mould-free, low EMF house see:  Prescriptions for a Healthy House: A Practical Guide for Architects, Builders & Homeowners.

How to Test Materials (MCS)

$
0
0
1. Sniff Test

The most obvious way to test for whether you are sensitive to something is by smelling it. This is probably how you came to find out you were sensitive in the first place. The plus side is that people with MCS often have a very good sense of smell, being able to spot a toxin from a considerable distance, and this can help you avoid offending particles. The drawback is that not all toxins have a scent, and not all scents are toxic. This method is obviously skewed towards those things with more of a smell, i.e. essential oils may register as worse than flame retardants because they are more noticeable, but they are not more toxic.

2. Sleep-Next-To-It Test

This test is recommend by experts in MCS. You can put something you are testing next to your bed at night and see how you sleep and how it affects you in general. This is probably the most widely used test for MCS sufferers. I find this test difficult because the item you are testing is likely quite small and it can be hard to tell if a large quantity would affect you. Since the effects of toxins are also cumulative, this is a fairly big drawback. I'm not sure how much sleeping pills affect this test. Another challenge with this test is you need a fairly "clean" toxic-free environment in which you are sleeping and it can  be difficult to keep other factors stable. Remember that changes in the weather, stress, emotions, medications, foods, chemicals sprayed outside or other exposures could affect your sleep or overall health.

3. The Erik Johnson Test

Erik Johnson's test for toxins involves first decontaminating and getting out into a very clean tent or trailer, somewhere where the air is really good and where you have not brought any of your former belongings. You can then lie outside, placing an item for testing on a tarp and see how you feel. Reactions can be delayed for up to four hours. The best indicators are anxiety, depression and insomnia. Remember that the effects of toxins are cumulative - the last item in a series of testing might not be the only offender. After you have tested it outside you can bring things into your dwelling one item at a time to test them. If you are testing a house/new location you will have to sleep there for a few days to find out if it is affecting you.

4. Naturopathic Test

There are various forms of muscle testing done by naturopaths and osteopaths that are quite good. Here is a how-to video. If you doubt the rationale behind it I would say suspend your disbelief for a while and give it a try. Use items you know to be tolerable as a base. If you are very in tune with your intuition and your energy and are very aware of how items, people, places, and sounds affect your energy, this could be a good method for you. I like to close my eyes during this test and try to avoid having what your brain knows about the object affect your body's intuition.

...And Go by What you Know

It is good to try all of these methods as none of them are a definitive way of testing every substance. I  am also a big advocate for learning about what toxins are in everyday items and materials so we can avoid them.

You need the knowledge to know which factors to isolate and test for, and you need the physical testing to find out which of those is actually a problem for your body. You might also find things you are physically sensitive to that you didn't intellectually know were toxic.

But I think if you know something contains a toxin and you can avoid a toxin in your food, personal care products, furniture, clothing, building materials, air, then do that!

Building A Non-Toxic Trailer

$
0
0
I spent weeks and weeks searching for a chemical-free trailer suitable for people with MCS. I finally came across a trailer made almost entirely of aluminum. I had it made based on the suggestions in this EI Wellspring article.  This post is an update on that article and I will add some suggestions for improvements.

The 11ft trailer is light & can be towed with my Ford Ranger
The 2014 Camplite travel trailer comes with no wood, no steel, and can be made without any vinyl or toxic upholstery. 

The walls, (inside and out), and the cabinets and benches are aluminium with a baked-on finish. The insulation is foam but is totally sealed off by the aluminum (aluminum is a VOC barrier). 


Custom table and Natural Latex cushions
I chose the 11FDB (11 x 7 foot interior) which still feels very spacious to me and has a washroom (toilet and shower), a kitchen (sink, fridge, room for hotplate) and is wired for 30 amps.

This still had a chemical smell when new. The amount of time it takes to offgas depends on the temperature and your sensitivities. I think after 6 months it was good but was not totally scent free. I recommend using an ozone generator to speed up the offgassing (more on the safety of using ozone here).


Here are the specifications that I had it made to:
  • NO Azdel cabinetry: Opt for aluminum cabinetry (an extra 279 USD).
Electric stove, fridge, aluminum cabinets
  • NO insulation under the floors - for a chemical spray-on insulation that is very thin, 1000 USD did not seem like a good deal for this option. I was planning to tile the floors and add rugs. 
  • NO Azdel interior or decorative wallpaper - Replace with aluminum walls (for 1000 USD).
  • NO propane furnace/AC.  I use an electric heater and portable AC/dehumidifier. The white exterior keeps it pretty cool inside, even in the summer sun. If I did it again I would definitely keep the propane furnace/AC. Not having it makes un-sellable to a non-MCSer. You can always remove the propane tanks off the front of the trailer and the little bit of added glue and plastic will not be significant.
  • NO propane range. I put in my own 2 burner cooktop (electric). Again you might want to leave this one in and put your own hotplate on top since it folds down underneath the counter. 
  • NO Formica (laminate): The only countertop option they have (for the 2014 model) is Formica with styrofoam on the inside. You'll have to make your own countertops or pay top dollar for them to custom make aluminum ones for you. Make sure they don't glue the Formica one down. The dinette is also Formica - again you can pay to have a aluminum one made, or like me have a custom table made
Custom countertop - tried wood, now in aluminum 
  • NO blinds, valances or screens on the windows or doors. No awning. No fold out tent.
  • NO cushions - mine are custom Natural Latex (non-toxic). I would have got them to leave the cushions, screens and blinds and store it somewhere else. In case you need to sell it to a non-MCSer. 
  • NO caulking. I asked for no caulking, but they did use it anyway. No caulk is not a good idea. You could send them a non-toxic one for them to use. Better to have them do it than you!
  • YES to the propane/electric fridge which vents to the outside.
  • YES to the propane water heater, like the fridge it is totally vented to the outside from what they tell me and from what the EI article suggests. Running short on amps here so if you want hot water.... 
If you are ordering one make sure to also specify not to put the black stuff (spray on insulation ) under the seats, and not to glue plastic on the inside of the cabinets. They should be all aluminum.


Further modifications made by me to remove toxins:


  • Replaced the vinyl shower hose with a metal shower hose. This was super easy to do and didn't require tools. 
  • Wash the whole thing down to remove factory residues.
      • I removed the laminate countertops and replaced with wooden one that I had made. The wood didn't hold up and I recently replaced it with an aluminum countertop. The cost of which was about $250.
      • I removed the cabinet doors and they offgassed outside for 6 months. They don't seem to smell when sniffed outside.


            Cushions made of Natural Latex
            • I replaced laminate/styrofoam table with a custom cedar table that holds up well in the humidity when the trailer is not being used.

            • I placed EVA Foam over the aluminum floor. The ones with faux wood printing had a strong odour that smelled really toxic. Some EVA mats were found to give off formamide, so that may have been the problem.  I removed the faux wood mats. These EVA mats would have been a better choice as they are formamide-free (as well as BPA, phthalate and flame retardant-free)

            • I had cushions made of Natural Latex. 3 inches is comfortable to sleep on. 

            Table folds down into queen bed

            The caulking, bits of plastic and rubber have lost most of their smell after about 6 months.

            This trailer was not cheap....coming in at around 27K with all the modifications (+ taxes). It took 13 weeks from the time I ordered it to the time it was delivered; I was told it would be 6-8 weeks, so give yourself a lot of time for the order.... and some time for offgassing.


            All trailers are going to contain some amount of caulking and glue in the pipes and wiring. This trailer is the least toxic option that I know of. Older trailers with insulation tend to have problems with mould over time... Camplites are very good in this regard, they have a sandwich type of insulation: aluminum-styrofoam-aluminum, laminated, so condensation will not happen in the walls and there is nothing that can mould in the walls. They are built to last.

            More pics of my trailer here.

            A Non-Toxic Kitchen

            $
            0
            0
            Creating a VOC-Free, Non-Toxic Kitchen

            Non-Toxic Cabinets

            Conventional cabinets are likely the largest source of VOCs in the kitchen, with all conventional brands using some kind of pressed wood, MDF, plywood or particleboard (or melamine with a particleboard interior) which all give off formaldehyde. Finishes are likely to be toxic unless stated otherwise.

            Healthy cabinets would be made of solid wood or aluminum. Of course, some are sensitive to the smell of wood and wood can also pick up and hold onto secondary odours and is more susceptible to mould than less porous materials. My cabinets are solid wood but the reason cabinets are made of particle boards is that solid wood in a kitchen will warp.

            Open Shelving with Salvaged Wood for Cabinet Doors
            There are companies that make aluminum kitchen cabinets with an inert finish, such as Fillip Metal. There are a few companies, Neil Nelly Cabinets, for example, that make low-VOC wooden cabinets (test for your own sensitivities).

            Custom hardwood or aluminum cabinets are of course expensive but here are a few ideas to reduce costs:
            •  Use shelves instead of upper cabinets - either wood, glass or metal
            • Salvage cabinets and countertops from demolitions as they may have off-gassed
            • DIY simple open shelving made of solid wood, tadelakt, and salvage materials

            Countertops for the Chemically Sensitive

            You want to avoid laminate, chemical sealants, anything with a particleboard substrate or anything glued down (mechanically fasten it instead).

            via belgianpearls.blogspot.ca
            Tiles: A good option other than the fact that the grout will need to be sealed regularly and could still become susceptible to mould. For information on choosing a non-toxic tile and sealer see Bathrooms and Finishes. This is one of the most affordable options.

            Butcher Block: It's likely that a toxic glue was used unless otherwise stated. Susceptible to mould. Affordable.

            Solid Slate: Find out if a sealant has been used. See post on sealants.

            Concrete: Here is a non-toxic countertop mix that does not contain fly ash, vinyl or latex. Seal with AFM Safecoat 2K Pro Urethane sourced from SBS 262-446-6702.

            Tadelakt Counters for Kitchen or Bath
            via style-files.com

            Tadelakt: Tadelakt counters are a unique and beautiful option. It needs to be a darker colour because is susceptible to staining and needs a wooden edge, as the plaster edge is vulnerable. It requires some upkeep. Here's a really handy how-to for earthen countertops!

            Granite/Marble: Find out what was used as a sealant and resin, or find a raw piece that does not contain either of those. Can befinished with a natural oil. Test for radioactivity with granite.

            Stainless Steel or Aluminum: Needs ground fault interrupter. Use non-toxic underlayment.

            Quartz: I used Cambria Quartz in my tiny home and it's absolutely beautiful. It is made of ground quartz, pigment and resin binders. They claim that the final product is fully cured (no VOCS) but it did have a smell for the first few days. After that then I found it totally safe. I did not use any glues to fasten it. It doesn't require a toxic sealant like granite, marble, slate. The price is comparable to marble, more than granite.Is a long lasting non-pourous material that doesn't need upkeep. It could be offgassed outside until it doesn't have a smell. 

            Other: Some Acrylics, like brand Corian, are GreenGaurd certified. Recycled glass is very similar to quartz and should also be safe.


            Non-Toxic Cooking

            Avoid non-stick cookware (Teflon) as it gives off perfluorooctanoic acid, something you do not want to be ingesting. 

            Avoid plastics and styrofoam containers, including tin cans and canning jars lined with plastic, which leach chemicals into food. 

            Avoid food containing chemicals such as MSG, preservatives, artificial colour and flavour and pesticides.


            Appliances for the Chemically Sensitive


            The chemically sensitive person will want to avoid gas and propane appliances. Especially gas stoves, which will be the largest emitter of fumes. A propane powered refrigerator might be OK if you do not have enough amps to power an electric one. A propane powered fridge should vent fully to the outside and could be acceptable in a trailer with a small electrical load.

            Of course with electric appliances, you will be subjected to EMFs. There isn't much getting around that. Though interestingly, the clock on your stove can give off more EMFs than the burners. It might be better to use a two burner hot plate and small convection oven. You can reduce EMFS further by using non-electric juicers, coffee makers etc.

            Consider using a bar sized, or apartment sized refrigerator to reduce EMFs and save on your electric bill. My fridge is 3.1 cubic feet and it's a perfect size for me. I left mine running in a garage for a month before using it. Metal fridges will offgas less than plastic.

            Another very sensitive blogger, Janis reports that Sunfrost Refrigerators use fiberglass instead of plastic (from what I have learnt fibreglass also offgasses). But, they will bake it at high heat before they ship it to offgas it in advance. Their fridge use less electricity than normal a fridge (fewer EMFS!). They are pricey at $3000-4000.

            It's a good idea to have a range over your stove to reduce moisture and mould in your house.

            Non-Toxic Teardrop Trailer

            $
            0
            0
            While I waited patiently for my own tiny home to be ready, I thought I would check out natural builder, Pat Hennebery's teardrop trailer.

            Pat, of Cobworks (B.C., Canada) has built over 25 cob houses. You can take a virtual tour of some of his natural homes here. If you have CFS or MCS, I can't recommend cob houses enough.

            Lately, Pat has become interested in healthy homes on trailers so we sat down to discuss his lovely teardrop trailer.

            The trailer is 16 ft long and weighs in at about 4500 lbs. It is wired with one 15 amp outlet and was originally set up to use solar panels. 15 amps is not a lot, but it is enough to run a space heater or AC unit, making it a seasonal trailer in colder climates. In warmer climates you could live in it year-round! This trailer was made for Canadian summers and Mexican winters, and has made the round trip twice already.


            The trailer is made mostly out of wood with no insulation. The ceiling is tongue & groove wood, the floors are solid wood, and the exterior siding is cedar which has been painted. Cedar, while it may have too strong a scent for people with severe MCS, does really well in wet climates; it's naturally quite mould proof.

            Some plywood was used in the flooring and walls but Pat mentions it could be replaced with hardwood. This trailer could be made for a chemically sensitive person by using unscented woods, VOC-free glues, and natural finishes and paints.


            The roof is stainless steel but Pat suggests that next time he would use aluminium to keep it as light as possible.

            It doesn't have plumbing so this kind of trailer is best used when you have an outhouse and outdoor shower. You could use a Solar Camp Shower in a pinch if it's warm enough!

            The back pop-out is designed for an outdoor kitchen. For those very sensitive to propane, this would not work very well, but since it is outdoors it could be tolerable. It's perfect at the village where Pat lives in the summer which has a communal kitchen.

            The materials alone for this trailer came to 10K - though Pat was not on a tight budget and did splurge a bit on the wood for the ceiling, a new trailer and stainless roof. Still, it's good to keep in mind that even a medium sized trailer, with no plumbing and no kitchen, just isn't cheap.

            The labour costs would add an additional 10K or so. The only way to do it on the cheap would be to spend a lot of time salvaging materials and building it yourself.... problem is, salvage materials can be very problematic for the chemically sensitive.


            I think this simple chemical-free trailer would work well as a permeant dwelling somewhere warm, or, as a way to test out the locations effect and start trying chemical and mould avoidance. If you can build it yourself, it's probably the least expensive chemical-free trailer option. Compare it to your other  options: an aluminum trailer, 27K,  a chemical-free tiny home, 50-65K, or, a refurbished Airstream 40K+. The only cheaper option is if you can figure out how to hack a cargo trailer and reno it without chemicals.

            If you are interested in attending Pat's cob building courses or having him build your own cob house or chemical-free trailer, you can contact him via his website Cobworks.

            A full post on the build of my tiny house is coming soon! You can follow my builder's photo blog here. The house will be ready in Oct. 2013 and I have a lot to share on sourcing and testing chemical-free materials including a full material list with costs.

            Glues and Silicone Caulks - Chemical-Free Versions

            $
            0
            0
            Something I learnt very quickly is that VOC-free and 100% silicone are relative terms. I tested all the wood glues that claimed to be non-tosic and all the caulks that claimed to be 100% silicone, or zero-VOC.

            Testing glues and silicones was the worst part of building my tiny house since I did this when I was highly sensitive. Many days were spent sick to my stomach, not sleeping, and having heart palpitations.

            OK, let's get to it.

            Wood Glues

            We are limiting the use of glue in my tiny house, and it might be possible to avoid it completely, but that's not ideal.

            I smelled them wet and they were all bad wet. I only tested a few dry. When wet, the worst reactions were heady and dizzy, when dry they were hard to get a read from - it's difficult to extrapolate a small jar of dry glue to a house filled with it. (In retrospect I would have tested a much larger dry sample.) I smelled them wet because I got a clearer sign of their relative effects on me. Since I have not figured out a better way to test materials that's all I'm working with.

            So here are the contenders:

            Gorilla Glue - Got pretty dizzy, not good, but not terrible. Seems OK when dry. (Easy to find at hardware stores.)

            Elmer's Wood Glue - Not good. Didn't test dry. (Carried at hardware stores.)

            The best of the wood glues
            Roo Glue - White and wood glue - Not great when wet, but not terrible. Seemed totally fine when dry. This is my top pick and what I ended up using. (Very fast delivery from online store to Canada.)

            RONA brand ECO white glue - Not good wet, didn't test dry. (Carried at RONA.)

            Titebond - This is a brand that is recommended for MCSers. I had already picked Roo Glue before I got a chance to test it. I do know people that build for the chemically sensitive who use this brand. (Online or at speciality building stores like Greenworks, Vancouver.)

            ECOS Wood glue - Check this out if you are in the UK or Australia. I didn't test it. (Not available in North America.)

            I've caught wind of totally natural glues made from hide (not waterproof) and something being developed from sea creatures, that one sounds great....but until then....good luck.

            Silicone Caulk

            While silicone itself is not toxic, something is clearly added to keep caulking in liquid form. For silicone caulks look for 100% silicone and a low-VOC claim. The replacement silicones are much more tolerable and Eco-bond does claim zero-VOC. They were all smelly when wet, and I tested them at 24 hours, 48 hours and one week. I would recommend getting a non-sensitive person to put them in jars and only testing them after they have dried. Note that silicones labeled bathroom or mildew resistant contain a mildewcide (except the Eco-bond bathroom caulk).

            The worst of the Silicones
            AFM Safecoat Caulk - Not the best when wet, not the best at 24 hours, but the best at one week. I used this in my bathroom. It comes in white and is a replacement for silicone.

            Eco-Bond - Another really good green brand. These are all zero-VOC. I tested this much later than the others, but I can say that this is another really great caulk. At least as safe as AFM with better bonding. It comes in white and clear. It is the only zero-VOC clear caulk that I know of. They are not silicone.

            GE Silicone II Clear Caulk - The best when wet, and the best at 24 hours, but not the best after one week. We used this on the underbelly of my house. This is the best of the clear silicones that I tested. It is low-VOC.

            Aquarium Caulk - I have read that aquarium caulk is the least toxic because fish are exposed to it and they can't handle chemicals. I tested two brands, Aquarium Silicone Caulker and one called Marina from a local pet food store, they were much more expensive than brands for home use (for no reason), and they were both the worst of the worst. So bad I would not recommend testing or using these brands.

            Adhesives

            The best adhesive I have ever tested isAFM Safecoat Almighty Adhesive. I had absolutely no problem and no reaction to smelling it while it was wet. This was a pleasant surprise after all the other glues and silicones. I will use this to install my shower. A whole post will be devoted to the custom chemical-free shower.

            Composting Toilets & Greywater Recycling for the Chemically Sensitive

            $
            0
            0
            I want to talk about composting toilets and greywater systems from the standpoint of the chemicals (and smells) involved, the feasibility for a disabled person, the costs, and the benefits for someone with MCS to being semi (or totally) off the grid.

            Self-Contained Composting Toilets for the Chemically Sensitive

            I have the SunMar Spacesaver in my tiny house because it's the smallest indoor self-contained composting toilet I could find in Canada, and the only one that will fit in my tiny bathroom. It was also the best priced unit. I absolutely do not recommend this toilet as it completely fails at handling liquids. Here are a few of the other challenges followed by some recommended brands:

            Toxic Additives in Composting Toilets?

            my bathroom
            I had a bad chemical reaction to the additives.  I didn't know that the toilet requires a significant amount of input in terms of additives (and money). There are three things you need to add regularly: 1) an enzyme spray which smelled fine to me, like a very light non-toxic soap might smell, 2) a bulking material of hemp, peat moss.... and maybe sawdust? This material will certainly be problematic for those extremely sensitive to mould. I can't detect any, but I don't see how it could be consistently mould-free. (You could definitely make/source your own bulking material. All the indoor self-contained composting toilets that I know of require some.) And 3) the microbes that you add to speed up the compost and keep it "odourless".

            I had such an acute reaction to the microbe mix. It smells somewhat like a urinal cake. Everything online said it was non-toxic and natural... hmm. I called them to ask what is in it and they said citronella.

            Citronella contains methyl eugenol which repels bugs and is considered toxic by Canadian governmental standards. There are a few essential oils I consider to be harmful for MCSers and citronella is definitely one of them.  I had to figure out what kinds of microbes were needed for the toilet and I found out that EM Bokashi will work just as well and doesn't have fragrance added.

            After using the toilet for a few months, I can say that the enzyme spray is not necessary. You could just use the Bokashi or Bokashi and a bulking material. However, I am not happy with this model at all. The upkeep is very smelly work and it often overflows with only one person using it. Dealing with the overflow is horrible. Even before it overflows the system is such that liquid accumulates below the tray where it becomes very smelly, and mouldy. One person using this toilet fulltime requires that it overflows into a septic system or blackwater system. Not very self-contained at all.


            Offgassing the Unit

            Another chemical issue is with the unit itself. It needed some offgassing outside to get rid of the plastic and glue smells. I left it outside for a week. A month would have been ideal.

            Necessary Hook-Ups

            There is some installation necessary that ideally would be contemplated before building the bathroom of a new house! A vent has to go through the wall, outside, and above the roof line. An emergency overflow valve needs to go through the floor and out to.... somewhere (a bucket)... or to the septic or sewage drain if you are on the grid. You do not need to have water as an input for this type of unit or bolt it down in any way. There are electric and non-electric self-contained units. The Spacesaver is electric. There is no need for a special outdoor compost for self-contained indoor composting toilets; the humus the toilets produce is totally benign.

            Benefits to Having a Composting Toilet

            There is a huge benefit to being off the septic system and that is the freedom to put your tiny house/yurt/dome on any piece of land with some extra amps to spare & a fresh water hose (and of course you could get totally off the grid with solar panels and rainwater collection). I'm going to be writing a separate post about zoning and where to put your portable home, the electrical requirements as well as the feasibility of being off the grid for an EI.

            Challenges

            If you are comparing the initial cost and cost of (ongoing) inputs to just hooking up to a city sewage line, then the self-contained composting toilets are going to seem expensive. If you are comparing the cost to installing a rural septic tank and the maintenance of that septic tank, then it starts to seem like a really good deal.

            If you are extremely sensitive you're going to want to make sure you can source some tolerable bulking material before you start. A lot of the maintenance also includes some very strong smells of excrement so you have to be able to tolerate that. I have seen some mould growing in the finishing drawer.

            Another challenge for people who are disabled is that there is some work - there is the buying of the additives and maintenance. Maintenance involves turning a crank every second day for a minute. Unclogging the mesh screen if that ever clogs up, checking to see if the system has overloaded via the emergency drain and other troubleshooting if anything goes wrong. There is a fair amount of troubleshooting so far for me. The fan will have to be replaced or fixed if and when it stops working. You also empty out the bottom drawer of benign humus every few weeks.

            I'm having trouble with the Spacesaver as I don't think it has enough capacity for one person let alone two. The tray is filling up too fast, which can be a major problem if you don't have somewhere safe to dump it and it overflows liquids.

            If you are building a new house (that's not on a trailer bed) on a site without sewage or septic already in place, you are probably going to be subjected to building codes that require more conventional systems.

            Recommended Composting Toilets

            Those who live in tiny houses recommend two types - either Nature's Head Dry Composting Toilet or the Separett.

            Envirolet is another company that sells self-contained composting toilets in Canada. Their toilets do not require microbes. They are slightly larger units.


            Other Types of Composting Toilets

            This post deals with indoor self-contained units but other types of composting toilets include: an outdoor bucket system, an outdoor dug out (outhouse), indoor central flush, central dry, and indoor bucket systems.

            Greywater Recycling

            Being off the septic system means you also need to safely recycle your greywater - which is the water that comes out of the kitchen sink, bathroom sink and shower. These contain more bacteria than you think via raw meat and the bacteria on your body etc.

            Eco-Sense has a really good free overview and guide including using a worm bin system to remove food scraps from the water. Here are the instructions for the worm bin filter system. There are a lot of different types of systems and for more detailed instruction this book is super user-friendly and outlines the simplest options depending on the number of people you have on the system.

            You need both some kind of filter and water dispersion. We tried just burying the pipe so that the water would simply drain into the ground but the water could not absorb fast enough and it backed up through the house. Gross, yes. We dug a small pit and it still backed up. Right now I have a larger pit but it still has no filter on it, so food remains and oil will build up in it and start to get gross eventually. So I still need to devise a filtration system to take out particles and grease. (NB it's not safe to have the water drain above ground).

            Chemical Load

            One more point that needs to be made about greywater and blackwater systems is that any chemical or medication that goes down your sink or toilet will go directly into your backyard. Keep in mind that urban sewage treatment plants do not treat or remove chemicals including those from hormonal birth control and medication, so those are already going directly into our water systems. Here are my complete guides to non-toxic, biodegradable personal care products and cleaning products.

            Natural Plasters: Some Challenges & Tips

            $
            0
            0
            Plaster is a great finish for someone who is chemically sensitive. I used clay plaster throughout my house but there are a few things I would have done differently:

            Clay v. Lime

            Wheat paste applied to walls
            Plaster over wallboard requires a textured substrate - a wheat paste primer was used under my clay plaster, which may become problematic (mould-wise) if the humidity level is not kept low. The plaster was custom mixed, but American Clay Plaster is very similar (and comes in a variety of colours). (Note: the natural colour of my plaster turned out to be quite grey although I wanted it to be white).

            A fibre needs to be used in the plaster which you must test before using. Alex used cattails found by the side of the road.

            In hindsight, I would have used lime plaster throughout the living space and kitchen so that I could have done tadelakt in the kitchen (more on tadelakt below), while keeping the colour consistent throughout.  Lime is naturally very mold-resistant though still requires a textured substrate (wheat paste or mesh?) (Lime plaster would have also been a lot whiter.)

            Problems with Plaster over MgO Board

            Crack above stove where we re-taped and re-Murcoed
            The MgO board and plaster in my tiny house cracked at every seam. We used joint tape and Murco joint compound at the seams but this did not stop it from cracking. (Murco was the only non-toxic joint compound I could find.) Even where we waited for the boards to settle and crack - re-taped and re-murcoed the seams, the boards and plaster still cracked along those lines. I am not sure what the solution to this problem is. I am also not yet sure how the plaster as a whole will hold up when the house is moved!


            Clay Paint over MgO Board

            Clay paint does not adhere to MgO board at all! We tried various times with various primers and in different thicknesses and it cracked and flaked off each time.

            Lime paint/lime wash also does not adhere to MgO board. It has flaked off in every consistency. Whether there is a trick to getting clay paint or lime paint to adhere to the wall I don't know what it is.

            Problems with Wood Next to Plaster

            Another challenge was that the hemp oil on the wood window/door frames seeped into the plaster slightly even though the wood had been oiled months before, was oiled before it was nailed to the wall, and seemed totally dry at the time we plastered. It is not a huge deal but I imagine if we had not waited so long for the oil to dry it would have been a much bigger problem.

            Burnishing and Tadelakt Finishes

            my finished kitchen
            Tadelakt is an amazing waterproof finish for lime plaster. It is a non-toxic finish which involves burnishing with an olive oil soap for many hours.

            I wanted to tadelakt the backsplash of my kitchen, but since we used clay in the living space and could not match the lime plaster to the clay plaster colour, I ended up using clay plaster in the kitchen.

            Alex plastered my kitchen (pictured on left) and burnished the plaster, which smoothed it a little, but did not make a huge difference.


            Sealing Clay Plaster: My Results from Testing VOC-Free Sealers

            I tested three different sealers for the clay plaster in my kitchen, which needed to hold up as a backsplash around the stove and sink. From left to right I tested: beeswaxAFM Safecoat WaterShield (2g VOC/Litre) and AFM Safecoat Penetrating Water Stop (zero VOC) (one and two coats),  on burnished clay plaster. I splashed Worcestershire sauce on the samples, waited a few seconds and then wiped it off with a sponge. The Penetrating Waterstop was the only one that fully protected the plaster from the sauce. Two coats, however, turned white and blotchy. Note, the beeswax also changed the colour of the plaster a little yellow but it's not possible to see that in the picture. So, it was an easy decision since the AFM Penetrating Waterstop had no discernable chemical smell to me at all.

            It's not ideal around the sink area where the plaster and the countertop meet, as I have to be excessively careful to not have any water pool up there. I might do a line of silicone there, but I am not sure that silicone caulking sticks to plaster, and, I react poorly to it. Another reason why tadelakt would have been a much better choice for the kitchen walls!

            A Non-Toxic Shower (Mobile & Non-Mobile Homes)

            $
            0
            0
            It took four people, five months to design, make and install a totally toxin-free shower, that will:

            -never get mouldy
            -last a lifetime
            -and hold up in a tiny mobile home (that flexes when it moves)!

            But we did it! We were this close to giving up and building an outdoor shower. In the end, the shower enclosure was made of aluminum and stainless steel with a zero VOC adhesive.

            The details are below, but first, some plans that didn't work (but may work in a non-mobile home).


            What didn't work for me:

            Tiles

            My first plan was tiles, but grout without additives (plain Portland Cement) will not hold up in the long-run to mould or to cracks in a mobile house. Even with Kurdi barrier underneath, I still felt like the area around the drain would be susceptible to cracks when the house moved. And I could not find a zero-VOC grout sealer to waterproof it.

            Tadelakt

            A non-toxic waterproof finish, tadelakt was also considered. However, all the plaster in my house has cracked. Some ideas to give it a little flex include - adding glue to the plaster and maybe a mesh underneath on the wall, but no one has tried this yet in a mobile home so it was a fairly big risk.  In a regular house (not on a trailer) this would be my first choice. (For the base/floor you still need tiles, fibreglass or metal).

            Fibreglass

            Will last a lifetime without getting mouldy but companies need to use their own adhesive, which is hugely toxic. Fibreglass offgasses styrene and most highly sensitive people say they react to it. If you found a used one or let one offgas and then installed it yourself with your own non-toxic adhesive this could work.

            Other Options 

            In a regular house, polished concrete might work really well, if you can find someone who can do that finish on walls and tight spaces. Glass walls are something to consider. An outdoor shower could be made of cedar, glass or concrete. More discussion on these materials in my post on bathrooms.

            My Chemical-Free, Mould-Free Shower! 

            A basin with 2-inch sides is made of stainless steel and the pipe in the center is welded in so will never leak around the drain (Stainless is going to hold up better than alum in the basin).

            I would have done more of a grade and a higher lip on the basin if I did it again. Underneath we used pieces of acrylic and Butyl Sealant Tape to support the grade.

            There are two sheets of thin aluminum panels that wrap around the three wall shower enclosure. The first piece of aluminum wraps around the three walls (no seams in the corners) and overlaps with the basin at the bottom (will never leak at that point).

            The second piece of aluminum overlaps over the first piece and goes up to the ceiling. A vent is right in the middle of the shower on the ceiling to reduce moisture. I am wondering if I should have had a piece of aluminum made for the ceiling as well.


            The shower curtain is this EVA non-toxic one (had a slight plastic smell but was fine for me) (other curtain options to try are polyester or polyethylene - or, even better make a glass door). My curtain has magnetic pieces that stick to the walls - to prevent water from splashing out onto the tiles which are not 100% waterproof (magnetic strips from Bed Bath.......and Beyond!)

            After testing many adhesives with no luck I finally found Almighty Adhesive by AFM and had no reaction at all to it even when wet! The problem of finding an adhesive was holding up the project for months and I was so excited to finally find this. It is also the only adhesive (including silicones) I have ever smelled that really is non-toxic. Even a regular non-toxic white glue smells more than this stuff.


            Around the edge of the aluminum will be sealed with AFM silicone which does take about a week to offgas. That is the only part with any toxins. I don't think it is entirely necessary......but I really want all the edges to be sealed. Strangely (happily) I no longer find this caulking to be problematic.


            So there you have it! A shower that will never leak or become mouldy and with no toxins! 
            TA DA

            my bathroom
            I have to thank the guys at BathMaster because they spent weeks problem solving this, designing the shower, and getting it custom made. They were willing to do whatever needed to be done to get me a shower I could tolerate.

            Notes:

            Once thing I would have done differently is not use any batting insulation in the bathroom walls. If moisture gets into the walls then it's over in terms of mould. I would have used only hard foam.

            Another thing to consider is to weld all the parts together. See Tiny Green Cabins stainless steel showers if you are interested in that route.

            The custom aluminum and stainless cost 800 CAD + installation which took 2 people all day. (We had to re-do some plumbing though which took longer than expected)

            Building a Non-Toxic Tiny House: Some Considerations

            $
            0
            0
            Some preliminary considerations if building a tiny home with all natural materials:

            1. Choosing Plans

            my house
            There are not a lot of companies selling technical drawings for non-toxic tiny homes. I only know of one: Tiny Green Cabins. Because I wanted a more modern style, I bought conventional plans from Leaf House. I wanted to change the layout to make the living room bigger, which entailed changing almost every other aspect of the design. In a tiny house, one change in the floor plans can change everything. This ends up costing a lot more not just in time spent redrawing plans, but in recalculating all the supplies: lumber, the electrical system, the plumbing system, (custom) window sizes etc. A lot of time (months) was spent calculating and ordering supplies. A week was probably spent on window placement and sizes alone. In order to reduce costs, you might want to start with pre-fab window sizes (or salvaged windows) and design around that. But it's way more efficient cost-wise to buy plans that are almost exactly how you want things to look.

            the floor plan for my house
            Just the change over to non-toxic materials  demands the following: changes to the framing in the flooring, changes to the thickness of the walls, ceiling, and floors (since insulation will be thicker), and changes to the weight. Not to mention non-toxic materials are generally twice the cost of conventional! You will also need to recalculate quantities of materials if using conventional plans, as you change from plywood to MgO board, and from foam (or SIPs), to cotton or wool insulation.

            Here is my builder's photo blog where you find a lot of tips on chemical-free modifications such as sequestering pipes, building a floor without plywood etc.

            2. A Builder who Understands Chemical Sensitivities

            I can't even imagine building with someone who did not have experience with natural building as well as a complete buy-in to the idea. The amount of time it would take a conventional builder to learn about non-toxic building would not make this a financially wise decision. It would also add a lot more work to your side and a lot more stress. Some tiny house builders I recommend are Jim from Tiny Green Cabins (MN, USA), Swanson Associates (TX, USA), Safeshelters (CA, USA).

            3. Trailer Weight

            the beginning of my house
            A big SNAFU was that the plans we bought were designed for a trailer rated at 10,000 lbs, but when you switch from conventional to natural materials you add a lot of weight. MgO board is much heavier that drywall and plywood; MgO siding or HardiePlank is heavier than wood siding; cotton and wool are heavier than foam insulation; and tiles or hardwood are heavier than vinyl or laminate flooring. A composting toilet is also fairly heavy. Because of this we were not able to put the other side of the walls on.


            4. Metal v. Wood

            my poplar frame, should have used
            cedar or maple
            Metal versus wood framing is a really important consideration. To oversimplify the issue, metal framing involves using a thermal break of either foam or bubble wrap. It gets a bit more complicated than that, but this discussion by Tiny Green Cabins should help. Another possibility to build the walls out of metal. For someone that cannot tolerate wood or MgO board this is an interesting new option. Check out this Facebook page and upcoming book to learn more about that. Consider that having metal walls, including foil inside your walls can aggravate EMF issues.

            If you can afford it consider Timbersil for the framing, it is an excellent material that solves the usual problems of wood and metal.


            5. Mobile Home v. Travel Trailer Registration

            MgO walls going in
            This was one of the most confusing aspects of the build. Regulations vary from Province to Province and I'm assuming from State to State as well. In BC to get your house registered as a mobile home you have to have it built by a certified mobile home builder. Now, how exactly you get certified is not something you can easily find out, and multiple calls to government offices only resulted in completely different accounts, most of it wrong information. I am assuming that it is only large companies that can afford this paperwork and fees which means you are not going to be able to build a non-toxic mobile home in BC - which is ridiculous. If you can find the work around here please let me know, and this is something we all need to work to change. Not getting mobile home certification means not being able to park and live at a mobile home park which is unfortunate. I will write a full post on where you can park a tiny home in BC.

            You can easily get certified as a travel trailer in BC (Ubuilt Travel Trailer is the specific designation) and this will also cause a lot of confusion at ICBC). You must find out the requirement before building, though there are not many requirements, i.e. one is the height, and another is a light on the back. There is an inspection sheet that is filled out at a mechanic that is certified to do this. Then you take that sheet to ICBC and hope that someone there figures it out (took me 5 trips to ICBC in total). You can then get house insurance as a mobile home or as a travel trailer.

            The requirements for a mobile home are much more thorough (if you are a mobile home certified builder) and must be contemplated before building. For example, with travel trailer certification, there was no requirement about grey water and black water tanks (and it turned out we did not need those tanks at all). No rules about composting toilets, nor was there any kind of meaningful inspection of the electrical system. Please make sure you do get the checklist for travel trailer before you build. It does have to be able to be moved so there are requirements for having it on the road.

            If you are having someone in the US build it get them the checklist for your province though it will likely be the same as the requirements in the US. You can import a travel trailer which is a bit of paperwork and might involve you going down to the border to do the paperwork.

            6. Choosing Materials

            Poplar wood on the interior too (should have used maple)
            It's hard to overestimate the time it takes - not just to re-draw plans to accommodate chemical-free materials - but to source and order those materials. I think we spent two months sourcing just the basic materials. You will have to do the leg work here as it's not possible to generalize where to procure non-toxic materials in every area. (Here is the sourcing for many of my materials). Every area will have a different supplier for MgO board, lumber, natural insulation, and the list goes on.

            Factor in another couple of months to order samples and test materials for your own sensitivities. If you get sick easily, this will be a long and protracted stage as you find out what you can't tolerate by getting sick over and over. There needs to be time for recovery between testing. Definitely err on the side of caution as your sensitivities will increase once in a clean environment. It was a happy mistake that the finishing was left to me after delivery. the testing of wood stains/sealers/paints/tiles/tile sealers/shower materials has been a very long process and it has been much easier to do this slowly over time. Materials that I didn't react to when testing but now do include: cotton batt insulation (if you react to new clothing you will react to that), MgO board (I am on the fence about it - a couple extremely sensitive people have said there is a slight reaction to it) and I have become much more sensitive to all paints and wood glues.

            7. Time to Offgass
            the view from my kitchen

            Many materials and appliances will need to offgas before use. I didn't do that well in my house for the first couple months so I would say even with the best materials there is wiring, there is plumbing and plumbing glue, there is wood glue, there will be some silicone in the walls - these all need some time to offgas. We left the appliances running for a month before use.


            Separate posts on tiny house systemscomposting toilet and grey water, custom non-toxic shower...

            More pics of my house here.

            Emergency Housing for MCS

            $
            0
            0
            Here are list of some housing ideas for those with environmental sensitivities needing immediate or temporary safe housing:


            KOA Cabins


            koa.com
            KOA cabins are located across the US and Canada. The cabins are made from mostly safe materials (mostly wood) and have been reported to be good places to stay for those who are environmentally sensitive. Ask if the wood has been stained recently. The bathrooms are separate and may or may not be mould-free depending on the location.

            For a list of good locations to try, see this post.


            Renting a Natural Home 

            The Sanctuary at OUR Ecovillage is a good place to stay
            Staying in a cob house (or straw bale, adobe, light straw-clay house) can be a really good option

            Ecovillages may rent out rooms in natural homes and there is a possibility of getting in on the communal meal plan as well. Search for some in your area and ask about monthly stays.

            The location you choose is also important as the outdoor air can be as important as the indoor air.

            For a list of more locations and rental possibilities
            see this post. I have seen some natural homes listed on AirBnB as well as on lists of intentional communities/ecovillages. 

            Always ask about propane, natural gas, cleaning products, and water damage. 


            Reflectix Dome Tent


            from: www.miketyka.com/projects/desert-dome/
            Regular tents are difficult because of the chemicals used on the fabrics, the lack of insulation and the tendency for them to go musty very easily and be a lot of work with the airing out and drying out. 

            Reflectix provides some R-value and reflects light so that should work in a lot of different climates, though the seams will reduce the insulative value. There are simpler designs for the structure that will reduce seams.

            You can't buy these - you would have to look online for the metal structure, then buy the Reflectix, foam, aluminum tape and duct tape and then have someone make it for you. See this post for the instructions

            I would also make at least one triangle out of polyethylene or an EVA Shower Liner so that you have some light. But have a flap of Reflectix over it that you open and close over this "window".

            For the base you could put styrofoam down and cover that with Reflectix, mylar blankets or polyethylene  For something a little more permanent you could get MgO board and put it on concrete blocks. You could put styrofoam in the spaces underneath - or do MgO/styrofoam/MgO. 


            Bubble Tent


            source http://dornob.com
            Made of thick polyethylene, these cute domes might inspire you to go glamping. They are available in the UK (Ebay) for 999 Pounds.  Hopefully they will come to North America soon.

            They include a fan that circulates fresh air.
            Though they would still be impractical for hot or cold weather. 


            Tenting

            There is no perfectly chemical-free tent as far as I know, but I have heard good things about cheap tents from Walmart, Big Agnes tents. Others report LL Bean and Colmen as having been tolerable. 

            For more information please see these excellent articles by EI Wellspring on Safer Camping and Safer Camping Equipment


            Metal Shed in Backyard

            homedepot.ca
            Steel sheds can be bought from hardware stores for 700-1000 dollars. You will also need to build a foundation, pay for labour to set it up, caulk the whole structure and likely put in some insulation. For everything you need to know about setting up a shed to live in see this post by EI Wellspring.

            Sheds are not as easy to take down as you would expect.


            Back of a Pick-Up Truck

            Try and find an aluminum canopy. The bedliner should be offgassed or can be covered with Reflectix or mylar. If ordering a brand new truck you can request no liner.

            Cargo Trailer

            Details on making a cargo trailer safe in this post. 


            Creating a Safe-Room in Your House with Tuf-Tuf 

            To create a non-toxic room in your home you can use Tu-Tuf (or Denny foil, or aluminum foil) on the walls/ceiling/floor. These materials block all VOCs (chemicals/toxins including mould). In terms of eyesore, Tu-Tuf is absolutely preferable.

            You want to use green Painting Tape for this as it will not damage the walls and is easy to remove - a healthy person could rip off/take down the whole room is probably 20-30 min (small room). The blue tape is toxic so I wouldn't use that. You could use aluminum tape but it is very sticky and will leave a residue/be hard to take off. 

            I would not do this where you have no vapour barrier in the walls and colder air inside than outside. You could just do this for a couple weeks to test how toxic your environment is. 

            I have used this successfully on areas that were offgassing (a new door) with no condensation issues. 

            Cover outlets, window frame but not the window. As for light fixtures, I would go around them.

            The only thing in the room should be clean bedding i.e. a new non toxic mattress or camping cot (etc). New non-toxic bedding and pillow. Be careful with bringing in EMFs producing devices if you use foil (that is also why Tu-Tuf is preferable). Practice decontamination and isolation - i.e. by new clothing for the bedroom and shower before entering. This will be a safe clean non-toxic place to sleep. It should help insomnia immediately. But be careful that when you open the window or the door that the air coming in might not be good, so this won't be a long-term solution. 


            Other Emergency Housing

            We should have emergency and long-term safe housing for people with MCS. Unfortunately this is not available in Canada. But check out the Environmental Health Association of Québec if you are a Quebecer. 

            In Canada there is a national Housing Connection service connecting people renters with housing. More info here

            If you are in the US, join Re|shelter's underground network

            When I come across places on AirBnB that look safe I list them here

            Sneak Peak and Q&A

            $
            0
            0
            I made a short video tour of my tiny house and will follow with some Q&As below!


            What are the dimensions

            The whole trailer is 20 x 8, the washroom is 30 inches x 8 feet and the kitchen is 7 feet long. Therefore, the living room is around 10 x 8 feet.

            What kind of wood is that and what are the walls made of

            Poplar is the wood used throughout. The walls are MgO board with clay plaster.

            What would you have done differently

            I would not have used poplar - I would have used maple because it's a hard wood that is low odour (low terpenes). I would have used cedar for the framing because it's so rot resistant.

            I would have used lime plaster and not clay throughout (and not used wheat paste under it as it is susceptible to mould).

            A vapour barrier was not installed on the warm side and this was a major oversight. The insulation will need to be redone next summer. I would not have used cotton as well since it's to mould prone and smells like sizing chemicals.

            I also would have planned the washroom dimensions around ready-made shower enclosures and the size/requirements of the composting toilet. Installing a custom shower and composting toilet after the fact raised the costs - this should have been planned for and installed during the build. I would have left out the grey and black water tanks as they are not necessary. And again not have used cotton insulation in the bathroom walls especially without a vapour barrier.

            The bathroom also has no heat source and gets extremely cold without a space heater.

            The heatpump, despite its robust size is not adequate for the winters - I have three space heaters at the coldest time - and for me is barely adequate as AC in the summer. The condensation tube is also too small and plugs up easily.

            What aspects are you happy about

            I'm really happy with the design and layout - it definitely serves my needs. I am exceedingly happy with the window alongside the bed. Since I am disabled I spend a lot of time lying in bed but now I can watch the birds and look at the trees and mountains.

            What do you do for laundry

            That's something I would have done differently -put in a combo mini washer/dryer under the stairs instead of storage (I do it all by hand now).

            Where is the rest of your stuff

            I have a few things in plastic bins under my house and in my car. There is room for more storage in the house: there is space for shelving above the toilet, a deep closet at the back of the landing as well as hooks behind the front door. In the corner where I have my laundry hanging, there could be a bookshelf instead. There could also be shelving on the back wall of the kitchen. I chose not to put in these additional storage spaces because I do not need them.

            Tiny House Systems for the EI

            $
            0
            0
            Tiny House Systems: Power, Water and Wastewater with a Focus on Reducing EMFs 

            Type of Power

            My tiny house is 100% electric. I could have gone with a propane on demand hot water heater and possibly with a propane powered fridge. Since these vent fully to the outside they should be safe. I decided not to because I would then have to deal with buying, transporting and hooking up propane. House insurance is also a little bit higher with propane hooked up. If you want to reduce the number of amps you are using then you will need some propane powered systems. I would not use a propane stove though as the fumes are very toxic. If you can afford solar it might be a good idea but it won't power much and then you have the added EMFs of the inverter.

            Power Supply for a Tiny House

            A regular house has 200 amps so what I did was take 100 amps off the house on this property with my own 100 amp panel. My tiny house is probably running on just over 60 amps so we went with 100 to be safe (we did not actually do the math on this one). Often rural properties in BC have 2 x 200 amps if they have a barn or small cottage on the land. Therefore, it is not too hard to find someone that has the amps to spare. A lot of people here use wood heat and gas stoves so they can spare the electricity even on the main house.

            The picture (right) is my submeter. I'm about 300 feet from the house that I hooked up to (I'm also losing some amps there from the distance, but we did not measure how much) My submeter just measures how much power I am using. None of this was done through the power company nor were they informed of this. I am not on a separate bill - I just use the meter reading to know how much of the main house's electric bill I need to pay.

            Between the submeter and my house the electric and internet cables are buried underground.

            A mobile home park supplies either 60 or 100 amps and trailer parks provide 15 - 60 amps, depending. They would also supply fresh water and a hook up to sewage/septic.

            Costs of using all Electic

            In the winter when I crank the heat I was paying about $130 a month. Now it's about $50 per month (Spring).  It's better to take your electricity off an old cottage or barn that is not being used much because if you have a two-tier payment system for electricity you are paying double the rate - as you will push the usage over to the second tier every month. This is a pretty major consideration as it can cost you up to 60$ a month extra.

            Tiny House Panels

            Here are my panels in my utility closet. I have two panels -  one for essentials that is always on and one that can be turned off at night.  As you can see in the pic what goes off at night is the oven, lights, sockets and bathroom. What stays on is the heat/AC, hot water, fridge and mechanical room. The panel that can be turned off is controlled by a fob (a garage door opener that can be used from the comfort of my bed).

            The same effect can be had from going out to the panel and turning off the unessential switches at night. But this involves going outside twice a day.

            Two tips, if you have a composting toilet you are going to need that on all night (otherwise it smells) so make sure you put that on the right panel. One more tip is to have the default position as "on" for the subpanel. When my power goes off I need the fob to bring that panel back on.

            There are also two sockets outside one that is connected to the permanent panel and one that can be switched off.  It's been very handy to have these two outlets in the shed for internet, heat tape (below) and for plugging in my travel trailer).

            Reducing EMFs

            The utility closet is separate from the house and on the opposite side from the bedroom in order to reduce EMFs. You can put foil or another EMF barrier in that wall and that will slightly shield you as well.

            Having a sub panel you can switch off make more sense in a big house where you can get some distance from the kitchen, heating system etc. I don't currently turn off the non-essential subpanel at night, as it does not make a difference for me.

            One thing you can try is to switch off the individual breakers to your bedroom and other non-essentials at night (and definitely switch off the wi-fi and put your cell phone on airplane mode) and see if that helps you sleep better.

            I also keep my modem out there in the utility room and it works perfectly fine in the humidity and in -10 C weather. This way it as far from the bedroom as possible. I keep the wi-fi off at all times. My house is wired with ethernet cables and there are three different outlets so that I can use the internet anywhere in my house. Wi-fi definitely affects my heart rate and sleep.  (Note this is not the usual way to wire internet  - you want the thick black cable to hook up to a modem outside and only have the ethernet cables running inside.)

            The cable company was nice about running the cable 300 feet from the house out to my trailer where I am essentially squatting. The part where it had to be buried was up to me to do.

            Water - Incoming


            Here on the right is my 40-litre electric hot water tank. It's pretty small but works great for two people. It did not freeze in -10 C weather even though it is outside. If it does freeze it will crack and have to be replaced.

            My water source is a hose that runs 100 ft above ground from an outdoor faucet. My hose has a heat tape on it which is that white cord coming off the pipes. Over the heat tape is insulation. This kept is from freezing in -10. The heat tape is plugged into one of the outlets in the utility shed only when it's below freezing out.


            Wastewater

            Here on the left is a not so great picture of where my greywater goes. (I have no blackwater because I have a composting toilet.) All the water from the shower and two sinks goes into a pit that is just outside my house. It is so overgrown with plants that it is very well disguised and impossible to take a picture of. In the winter though you can see it and if you are trying to avoid inspectors seeing it you will need to come up with another way to hide it in winter.

            The red rectangle shows how big it is. It is not very big at all, about 1 ft x 4 ft. I keep thinking it needs to be bigger but it has not caused me any problems as it is. I have had to go out and remove the sludge that builds up a couple times in the last 8 months. I don't have any filter on it that prevents oils/grease/food particles/hair conditioner from going straight into the pit.


            Heating and Cooling

            Lastly, my heating system is tucked in the top part of my utility closet and is hard to take a picture of. It is a mini-split heat pump which provides heating and cooling. It has a dehumidifying mode but it does not pull moisture from the air - it is simply an adjusted AC setting. I also have two extractor fans, one above the stove and one above the shower to remove excess moisture from the air and that works well to keep my humidity levels in the safe zone.

            The heat pump is 12,000 BTUs which is more than the company recommended, but I am glad I went with it anyway. In the winter I often had it on full blast with 2 space heaters going as well and on the hottest days (up to about 30 degrees C) the AC is needed on full force especially with cooking and showering all in this small space.

            How-To: Staining Wood with Natural Pigments

            $
            0
            0
            Alex used natural milk paint pigments from Homestead House to stain the poplar floors and stairs in my tiny house. These pigments were extremely difficult to work with and I did not end up liking the result. But I have a few tips on how to get a better result.

            The first tip is you can not go too many shades darker with these pigments. You can go one or two shades darker at most. Here you can see what happened when we stained the very light popular floor dark brown. It turned out very patchy and uneven. (Partly this was due to a soft wood and the way poplar absorbs things, but I think it would come out uneven on any type of wood).

            We had to go back over the floors and sand part of it off. Then go in by hand and sand the darker bits. It still isn't where I want it to be.


            The stairs went a little better as we did not attempt to go too dark there:


            Applying the stain is also a difficult procedure. If you just paint it on with a paintbrush or with a cloth it will go on even more blotchy than this, and you will see all the brush lines. or lines from the cloth, because it dries in a few seconds.

            Here's how to apply it:

            1.  Tape off the wood along the seams in 3 or 4 inch sections length-wise. Do not tape it off width-wise or you will have a dark looking seam there.

            2. Continually mix the stain/water solution so that you get a consistent amount on the brush. (2 or 3 people are needed)

            3. One person paints on the stain with a brush and keeps moving down the length without stopping because it dries in a few seconds and you will have marks of where you stop if you stop. Overlapping the stain will also leave a noticeable splotch.

            4. The second person follows, rubs in the stain/removes the excess with a cloth to even it out.

            This has to all be done very fast.


            A Note on Sealing 

            On top of the stain we put hemp oil. The picture on the right is grime from the landing floor. This is just hemp oil with no stain. It does wipe off with a cloth.

            A better sealer for floor and stairs is ECOs clear varnish. It's zero VOC and smells very benign to me.


            Avoiding Flame Retardants in the Home

            $
            0
            0
            Sources of Flame Retardants in the Home

            Many household items in North America will likely contain flame retardants (FRs) unless stated otherwise. Especially those containing polyurethane foam. (Same goes for polyurethane pillows including nursing pillows).
            Polybrominated diphenyl ethers (PBDE)

            Dr Mercola says, "be especially careful with polyurethane foam products manufactured prior to 2005, such as upholstered furniture, mattresses and pillows, as these are most likely to contain PBDEs. If you have any of these in your home, inspect them carefully and replace ripped covers and/or any foam that appears to be breaking down. Also, avoid reupholstering furniture by yourself as the reupholstering process increases your risk of exposure" (source).

            Flame Retardatants in Couches and Mattresses 

            Now that California has changed its policy requiring flame retardants in furniture, it is a whole lot easier to find beds and furniture without these toxic chemicals. Even better, California law now requires a label indicating whether there are chemical flame retardants or not in the furniture. These new laws take effect January 2015.

            Flame Retardants in Couches

            A lot of the big companies are getting rid of flame retardants in their couches that are manufactured after January 2015. The big companies now are free of chemical flame retardants, including:

            -Room and Board
            -IKEA
            -Crate and Barrel
            -West Elm and Pottery Barn

            Keep in mind that these companies use toxic foams, glues, fabric finishes and possibly particle boards. Companies selling green upholstered furniture generally do not use flame retardants. Always ask, but I have not found one that does. For a list of totally green, non-toxic sofa companies see my post on non-toxic furniture

            A Common Question: Does IKEA use Flame Retardants?

            This used to be a question that would result in a lot of run-around from the company. Now IKEA furniture (upholstered and mattresses) made after January 2015 and sold in the US and Canada does not contain flame retardants in the bedding and sofas. The stitch bond and zippers do contain chemical flame retardants.

            Flame Retardants in Mattresses

            With mattreses, some of the big companies are also moving away from toxic flame retardants - companies like Naturepedic, Sealy, and IKEA.


            Sultan Heggedal via www.ikea.com
            In both Canada and the US, IKEA's SULTAN HEGGEDAL (made of 85% natural latex with no polyurethane or FRs) is a fairly safe mattress. (The only chemical component is 15% synthetic latex). 

            See my post on mattresses to source natural versions that do not contain synthetic materials or offgass harmful chemicals. There are 100% natural options for mattresses that can come fairly close to the IKEA price point on the SULTAN line.


            Carpets

            There are many companies making organic or natural fiber carpets, such as wool. And for rugs, some good options include cotton, rattan or jute. Carpets should explicitly state that they use all natural materials. I go over the greenest carpet companies in this post. Conventional types from big box stores contain a long list of chemicals including flame retardants. However, many big box stores now carry carpets with the Green Label Plus certification which means the carpets emit low levels of VOCs. Always ask about FRs, since these are not considered VOCs.


            Be careful when removing old carpets as the FRs can become scattered as dust. Do not do this yourself if you are sensitive, and have all the dust cleared before reentering the room.

            Curtains

            It's hard to know which curtains contains FRs as they will not be labeled. I would assume that curtains from hardware stores and conventional stores do contain flame retardants as well as a formaldehyde finish. I have a post on window coverings with chemical-free options. 

            Flame Retardants in Insulation

            Rigid Foam insulation 

            HBCD is typically used in polystyrenes, in concentrations of up to 1% in EPS, and up to 5% in XPS. TCPP is typically used in polyisocyanurate foams (up to 10%).  (source )

            There is no EPS or XPS insulation without flame retardants on the market currently. (source)

            The only rigid foam insulation I know of without flame retardants is JM polyiso foam backed with foil.


            Spray Foam Insulation

            Almost all spray foams made in the US contain FRs according to Treehugger, usually TCPP (source)

            Natural insulation options in my post on Insulation.


            Retardants in Electronics

            Apple phased out brominated flame retardants (BFRs) in 2008 but uses "safer" unspecified flame retarding chemicals. Motorola is BFR-free and Sony has phased it out of some products (source). How much these can leach out of electronics is not clear. With furniture, it is when the particles become dust bound that they become the biggest problem.


            How to Clean up Flame Retardants in the Home


            Flame retardants become mobile in dust as opposed to gas. So keeping a dust free home is of utmost importance. David Suzuki says, "household dust is now recognized as one of the most significant sources of childhood exposure to toxic substances."

            HEPA vacuum is the best way to deal with the dust if you have conventional furniture, carpets and curtains. You can also add a HEPA filter (or even better, this one) to a Shop-Vac. High-efficiency filter bags are needed to catch all the fine dust. 

            Dust also contains phthalates, metals like lead, mercury and arsenic, and pesticides (Suzuki). The best way to remove particulates and (and VOCs, and mould) from the air is a HEPA air filter. The best one of the market is the IQAir. A good one that is a more affordable is this Honeywell.

            Natural Wall Systems

            $
            0
            0
            The following are concrete and earth based wall systems that do not offgas toxins and are suitable for the chemically sensitive. Something a little different from the standard timber frame, spray insulation and gypsum boards:

            lowcostgreenhome.com
            Pumicecrete Walls

            A mix of pumice and concrete are poured into forms to create these non-toxic walls. They can be made load bearing with a concrete beam. Test pumice for radioactivity and for odours that it may have picked up prior to installation.


            Wikipedia.org
            Hemp Crete

            An interesting material making a comeback, Hemp Crete is blocks made of hemp and a lime based binder. The blocks are used to form the walls and act as insulation. They are not load bearing so are used with a timber frame.


            faswall.com
            Wood Insulated Concrete Forms

            Forms are made of a mix of remineralised wood and concrete. Inside, rebar is used as reinforcement and then they are filled with concrete. Insulative fibers can be added or they can be filled with part concrete and part clay or a non-toxic insulation. Brands include Durisol and Faswall.


            aerconaac.com
            Aerated Autoclaved Concrete

            Concrete based blocks made from quartz, lime or cement, and aluminum powder. Test thinset mortar for sensitivity.


            Is Concrete Non-Toxic?

            Portland Cement should be used and it should be confirmed that it is free of admixtures such as air
            entrainment and water reducing agents, accelerants and retardants, and super plasticizers. Ceramic Cement (Magnesium Cement) is also a good option according to George Swanson.


             Which Concrete Aggregates are Chemical-Free?

            Natural non-toxic mineral aggregates should be used. Toxic aggregates include crushed brick, crushed 
            sandstone, concrete slag, fly ash, cinder, and volcanic materials other than pumice. (Prescriptions for a Healthy House).


            Wall Boards

            Magnesium Oxide Board is the cleanest option. I talk more about it in my post on Bathrooms.

            A FAQ is whether there are non-toxic drywalls. Of the wall boards out there DensArmor Plus is recommended by some - it is low-toxin, but not non-toxic. I do not know of any zero-VOC conventional drywalls.


            Natural Building: Earth Based Walls

            Cob, Adobe, Light Clay-Straw, and Straw Bale and Rammed Earth

            Adobe house from trails.com
            These are all different types of walls made of clay, straw, and sand. But instead of giving a comprehensive overview I will comment briefly on the suitability of these building materials for the chemically sensitive. Houses made of all natural materials feel great to be in and there is no need to worry about any offgassing. However there are precautions that should be taken to avoid mould. These types of builings might be best suited to dry climates so that there is no chance of mould forming. Some people seem to be doing very well in adobe houses in the south-western US.

            If straw is used in the walls it should be carefully sourced to be free of mould and pesticides. When building with cob, adobe or light clay straw there needs to be a dependable dry season of three months for the walls to dry out properly. They are particularly suited to be heated with wood stoves as that dries out the walls well in the rainy and damp seasons (source: Econest). An above grade stem wall and proper drainage around the house is also very important to keep the walls from getting damp.


            Rammed Earth from sirewall.com
            Another natural wall system worth mentioning in a little more detail, Rammed Earth, uses sand, gravel and clay has had an interesting development recently. Foam has been added for insulation and steel for support, and 5-10% cement is added to the clay mixture. It's called Stabilized Insulated Rammed Earth.

            Water does not penetrate the walls.


            Paula Baker-Laport has more tips for mould free construction of earth based walls in her book Prescriptions for a Healthy House: A Practical Guide for Architects, Builders & Homeowners


            Non-Toxic Windows and Window Coverings

            $
            0
            0
            Window Frames

            Metal - Steel or aluminum windows with a baked on enamel finish are the greenest, safest option. It is what I used in my tiny house (pictured left). On the interior they are framed out in wood so they appear to be wood framed windows.

            What is used in the windows as a thermal break is blocked by the glass and metal so there is no need to worry about any offgassing.

            Wood - Wood windows are usually treated with fungicides. You could use a sealer that seals in VOCs like AFM Safecoat Safe Seal,  AFM Safecoat Transitional Primer, or B-I-N Shellac Base Primer & Sealer. You could go with custom wood windows to avoid fungicides, but they are more expensive and you still have to consider what kind of sealer you can tolerate on the inside and outside. Finding a suitable sealer for outdoor wood is tricky. AFM Safecoat Durostain or AFM Naturals Clear Penetrating Oil are two options. The outside would need to be re-stained on a regular basis.

            Consider also the glue that is used in conventional wood windows could be irritating for the sensitive person. If you are having custom windows made see my post on safer wood glues.

            Fibreglass - Fibreglass offgasses VOCs and most sensitive people do report reacting to it.

            Vinyl - Vinyl offgasses VOCs and is not a healthy choice.

            Gas filled - Windows filled with argon or krypton gas have a higher insulative value and both gases are considered non-toxic.

            Sealing Windows

            Silicone - My top choice for silicone is Eco-Bond but I review a few different options in this post.

            Sealing around windows and doors - Wool products can be used instead of polyurethane foam. Some options are available at Loghome Wool.


            Window Flashing

            I used NovaFlash which is a zero-VOC product.

            Window Coverings 

            Source: Blinds Chalet
            Screens - Conventional screens are very smelly at first. They can be left outside to offgas or aluminum screens can be used instead. Marvin is one brand that makes the aluminum options.

            Fabrics - Fabric curtains are usually treated with wrinkle-free chemicals and flame retardants. Natural fabrics do break down in UV light but are a better option.

            Blinds and Shutters - Green versions include naturally finished wood shutters, metallic venetian blinds, and bamboo roll down blinds.

            Between the Glass - Between the glass is a really cool option. Here is an example.

            Non-Toxic Blackout Shades - This is a hard to come by product. Blinds Chalet blackout liner on the bamboo shades is PVC- free and they claim that it is environmentally friendly. Earthshade makes eco black out shades and rollers that are probably the safest ready-made option on the market. Another option to consider is this paper Black Out Pleated Shade - the company claims in an email they do not give off any hazardous chemicals. Another really safe option (truly the safest) would be to make your own black out curtains with pesticide-free hemp fabric.


            Avoid vinyl roller shades and vinyl miniblinds, PVC and conventional blackout curtains.

            Tour of my Non-Toxic Tiny House

            Building a Non-Toxic Sofa

            $
            0
            0
            Here is my chemical-free new sofa!

            We used maple because it is a hard wood that is non-aromatic (it does not have a strong terpene smell). 

            The stain we used was Naturhaus Harmonic, which will soon be available online. The ingredients are: beeswax, carnauba wax, shellac, and a cosmetic emulsifier. It had a very sweet smell for the first two days. 

            Other options for stains are AFM Safecoat WaterShield or Ecos.

            The glue used was Titebond


            Sketch of my sofa
            The Foam is a piece of 3" natural latex. This has a natural rubber smell (which doesn't fade completely with time) but does not give off chemicals the way conventional foam does, nor does it contain flame retardants. 

            Metal brackets reinforce the frame so that the side piece can be leaned on. The inspiration picture had low sides that would not be as comfy; I didn't think I'd be able to curl up on that sofa.

            The dimensions are 28 in depth (standard sofa depth), height from seat 16 in (fairly standard), length 5 feet (length was made to fit in my tiny house).

            The inspiration
            The costs were:

            Maple               468
            Metal Brackets 200
            Labour               40 hours
            Foam                804 (from a local shop. Much cheaper on Amazon)
            Fabric               150
            Sewing             237

            Total was around $3500.

            This is expensive, even for a chemical-free sofa.

            Another option is to buy a sofa from a company that makes non-toxic upholstered furniture. I have looked into and compared these companies in this post


            Viewing all 96 articles
            Browse latest View live


            Latest Images